Wolfeye Quickstart: Install and See Your First Live Screen in 5 Minutes
This quickstart shows you, from a purely technical perspective, how to install Wolfeye Remote Screen on a Windows PC and see the first live screen in your browser. No legal advice.
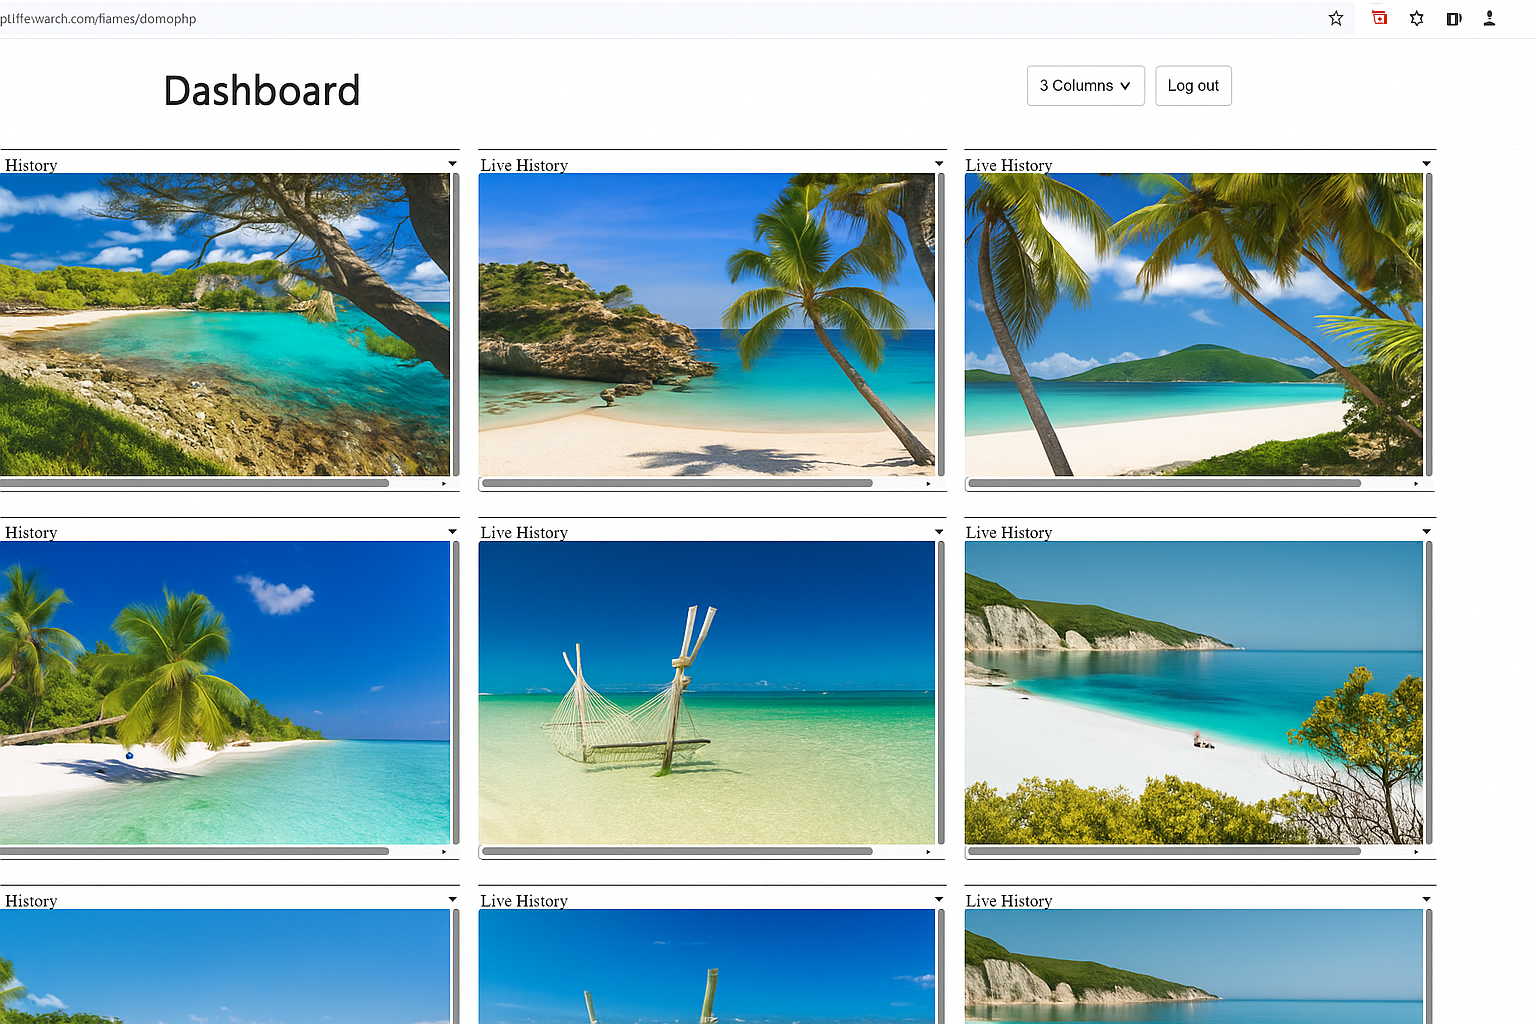
Illustrative Wolfeye dashboard: several company controlled PCs monitored side by side in one live view.
Wolfeye Remote Screen is software that technically allows you to watch the live screen of company controlled Windows PCs and (optionally) store screenshot history. This quickstart focuses only on the technical steps to get from download to the first live screen.
Important: Monitoring employees, screens or devices is always a legal and sensitive topic. Whether you may use Wolfeye at all, for which purposes (for example training supervision or quality assurance) and under which conditions (for example information or consent) depends on the laws in your country and your specific situation. Always obtain individual legal advice before using monitoring software in a real environment.
1. Prepare Windows and Your Antivirus
Before downloading and installing Wolfeye Remote Screen, prepare Windows and your antivirus so that the software can run without being blocked.
- Open your antivirus program or Windows security suite.
- Add an exception for the Wolfeye installation folder. In most setups, Wolfeye uses the following folder on the monitored PC:
C:\Users\Public\Documents - Save the exception. This will prevent the monitoring component from being quarantined or removed.
If you manage multiple company PCs, repeat this step for each device or roll out the exception centrally using your endpoint security solution where possible.
2. Download the Wolfeye Remote Screen Setup
Next, download the Wolfeye installer to the Windows PC that you want to monitor.
- Download the Wolfeye Remote Screen EXE file (usually packed in a ZIP archive).
- Extract the ZIP file so that you see the installer file (for example
wolfeye_setup.exe).
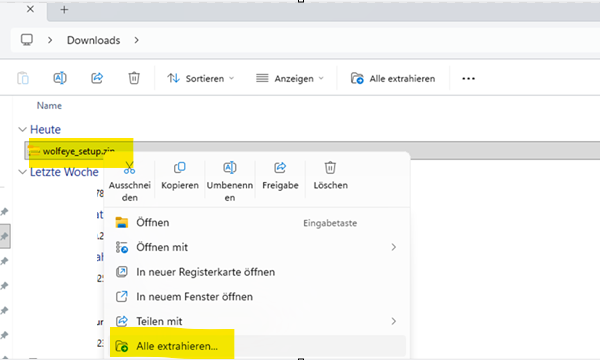
Example: unzip the Wolfeye Remote Screen ZIP file before starting the installation wizard.
Keep the file in an easily accessible folder (for example Downloads), because you will start the installation from there in the next step.
3. Run the Installation Wizard (Including Microsoft Defender SmartScreen)
Now install Wolfeye on the Windows PC.
- Double click the downloaded installer (for example
wolfeye_setup.exe). - If Windows shows a Microsoft Defender SmartScreen window because the file is not yet recognised, click "More information" and then "Run anyway" to continue.
- The Wolfeye installation wizard opens. Follow the guided steps:
- Click Install.
- Wait until the installation completes.
- Click Finish.
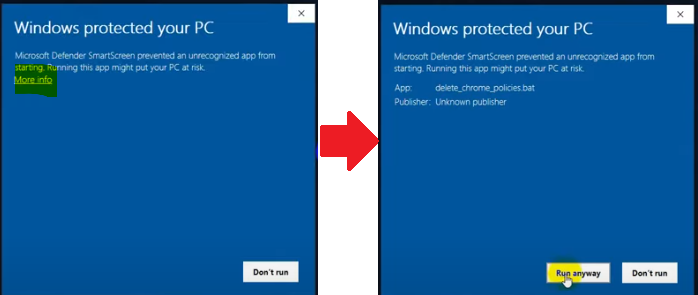
Example: Microsoft Defender SmartScreen window when starting the Wolfeye setup. Click "More information" and then "Run anyway".

Wolfeye installation wizard: follow the steps, click "Install" and then "Finish".
After finishing the wizard, the Wolfeye control window appears on the monitored PC.
After you click Finish, Windows will close the wizard and the Wolfeye control window will appear on the screen.
4. Use the Wolfeye Control Window: Press Three Buttons
After installation, you will see the Wolfeye control window. This is where you activate screen sharing and receive your personal live screen URL.
Press the following three buttons in the control window:
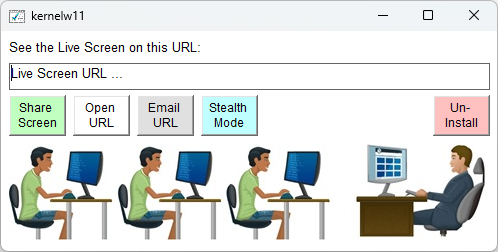
- "Share Screen"
This button starts the screen sharing on the current PC. From this moment on, Wolfeye sends screenshots from this computer to your dashboard so that you can see the live screen in the browser. - "Email URL"
This button sends an email to the address you entered during signup. The email contains your personal live screen URL link where you can watch the PC screen in real time. - "Stealth Mode"
This button hides the Wolfeye software from the user interface as far as technically provided and makes it start automatically with Windows. The program then runs in the background.
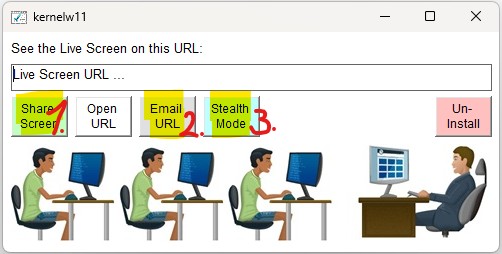
Wolfeye control window: press Share Screen, Email URL and then (optionally) Stealth Mode on the company controlled PC.
In the email, you will receive a link to open the live view of this PC. You can bookmark this link in your browser for later use.
5. Open the Live Screen in Your Browser
Once you have pressed the three buttons in the Wolfeye control window, check your inbox for the Wolfeye email.
- Open your email inbox.
- Locate the Wolfeye message that contains your live screen URL.
- Click on the URL link. Your browser opens the Wolfeye live screen page.
- You should now see the current screen content of the Windows PC where you just installed Wolfeye, updated every few seconds.
If you do not see any image, check:
- whether the PC is online and Windows is running,
- whether your firewall or antivirus is blocking the connection,
- whether you really pressed the three buttons in the control window.
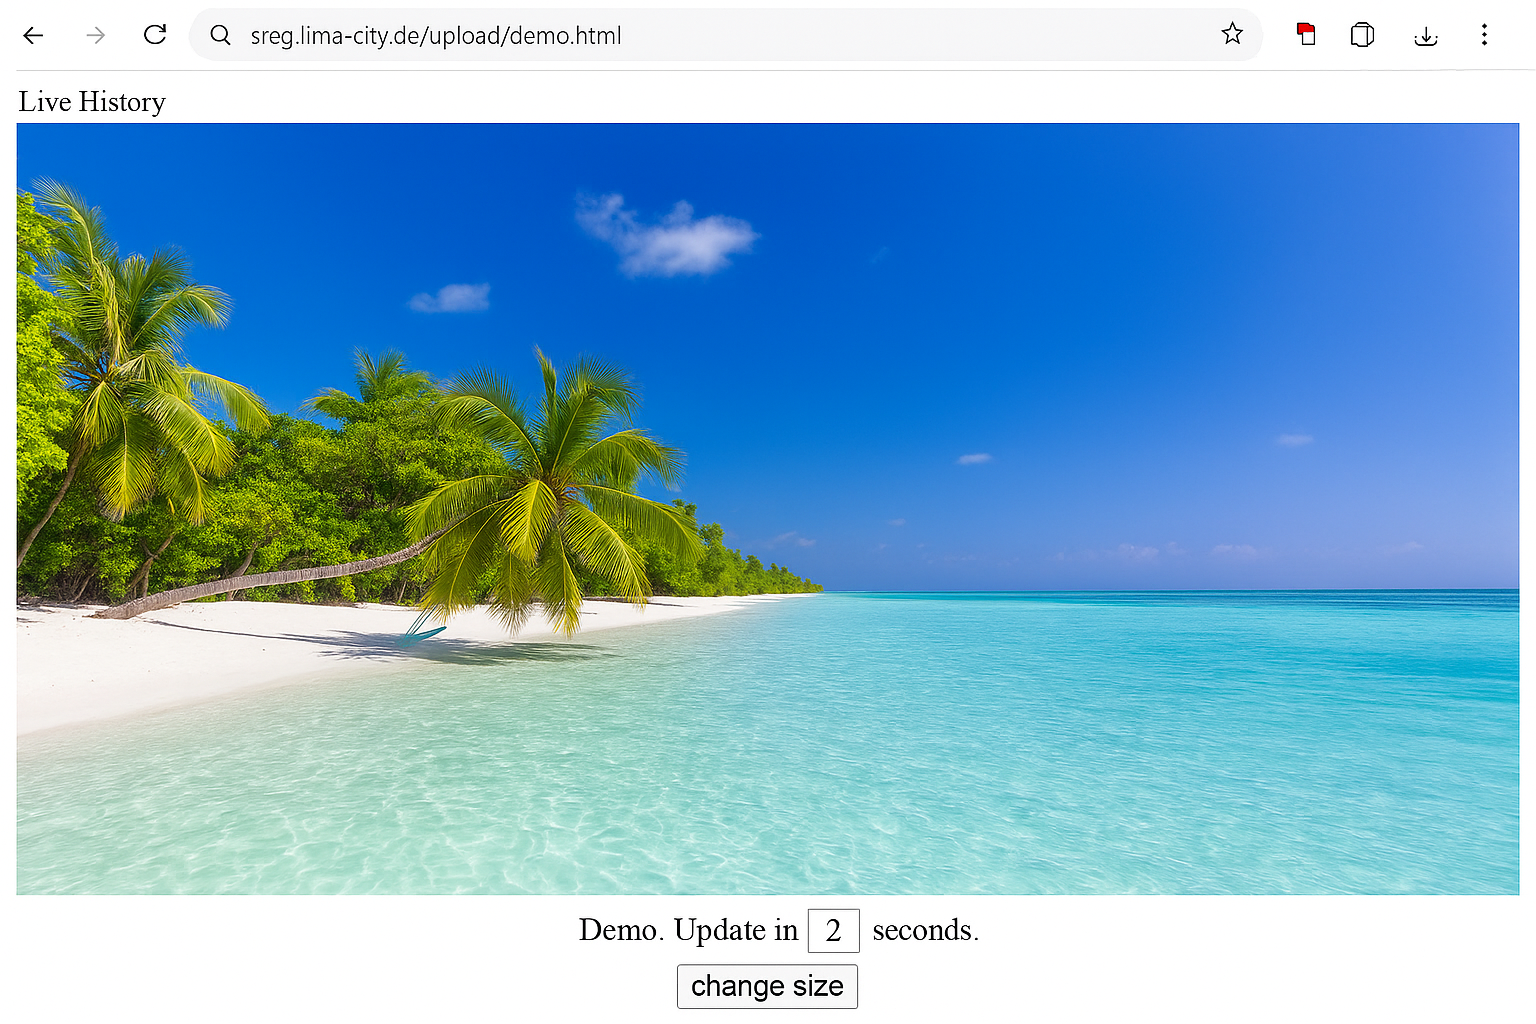
Example: live view of a single company controlled PC in Wolfeye Remote Screen.
6. Install Wolfeye on Every PC You Want to Monitor
If you want to monitor more than one computer, simply repeat the same installation steps on each additional company controlled Windows PC.
- Set the antivirus exception on the new PC.
- Download and run the Wolfeye Remote Screen setup.
- Press Share Screen, Email URL and (optionally) Stealth Mode in the control window.
All company PCs on which you install Wolfeye and press Share Screen will be available in your Wolfeye dashboard. From there, you can switch between live screens or watch several screens side by side.
Example: the Wolfeye dashboard shows multiple company controlled PCs that have Wolfeye installed.
7. Terms of Use and Legal Notice
Terms of Use (technical summary): The use of Wolfeye for illegal or unlawful purposes is strictly prohibited. You must not use the software on devices that you do not own or control, or on devices where you do not have a clear legal basis and permission to monitor.
- Only install Wolfeye on company controlled PCs where you are authorised to do so.
- Always comply with applicable data protection, privacy and labour laws in your country and industry.
- In many jurisdictions, monitoring employees without prior information or consent is restricted or prohibited.
This quickstart describes technical setup steps only and does not replace legal advice. Before you use Wolfeye or any other monitoring software, consult qualified legal experts in your country to clarify whether and under which conditions monitoring is allowed in your specific case (for example for training supervision or quality assurance).
Want to test Wolfeye on your own company PC?
Start 14-day free trialWolfeye is monitoring software. Any use must comply with the laws and regulations that apply in your country, your industry and your specific use case. This quickstart is purely technical information and does not constitute legal advice.