How to Monitor Employee Screens Live and Set Up Screenshot History (Step-by-Step with Wolfeye)
From first install to a working dashboard: see live employee screens and review past activity with screenshot history – without complex infrastructure.
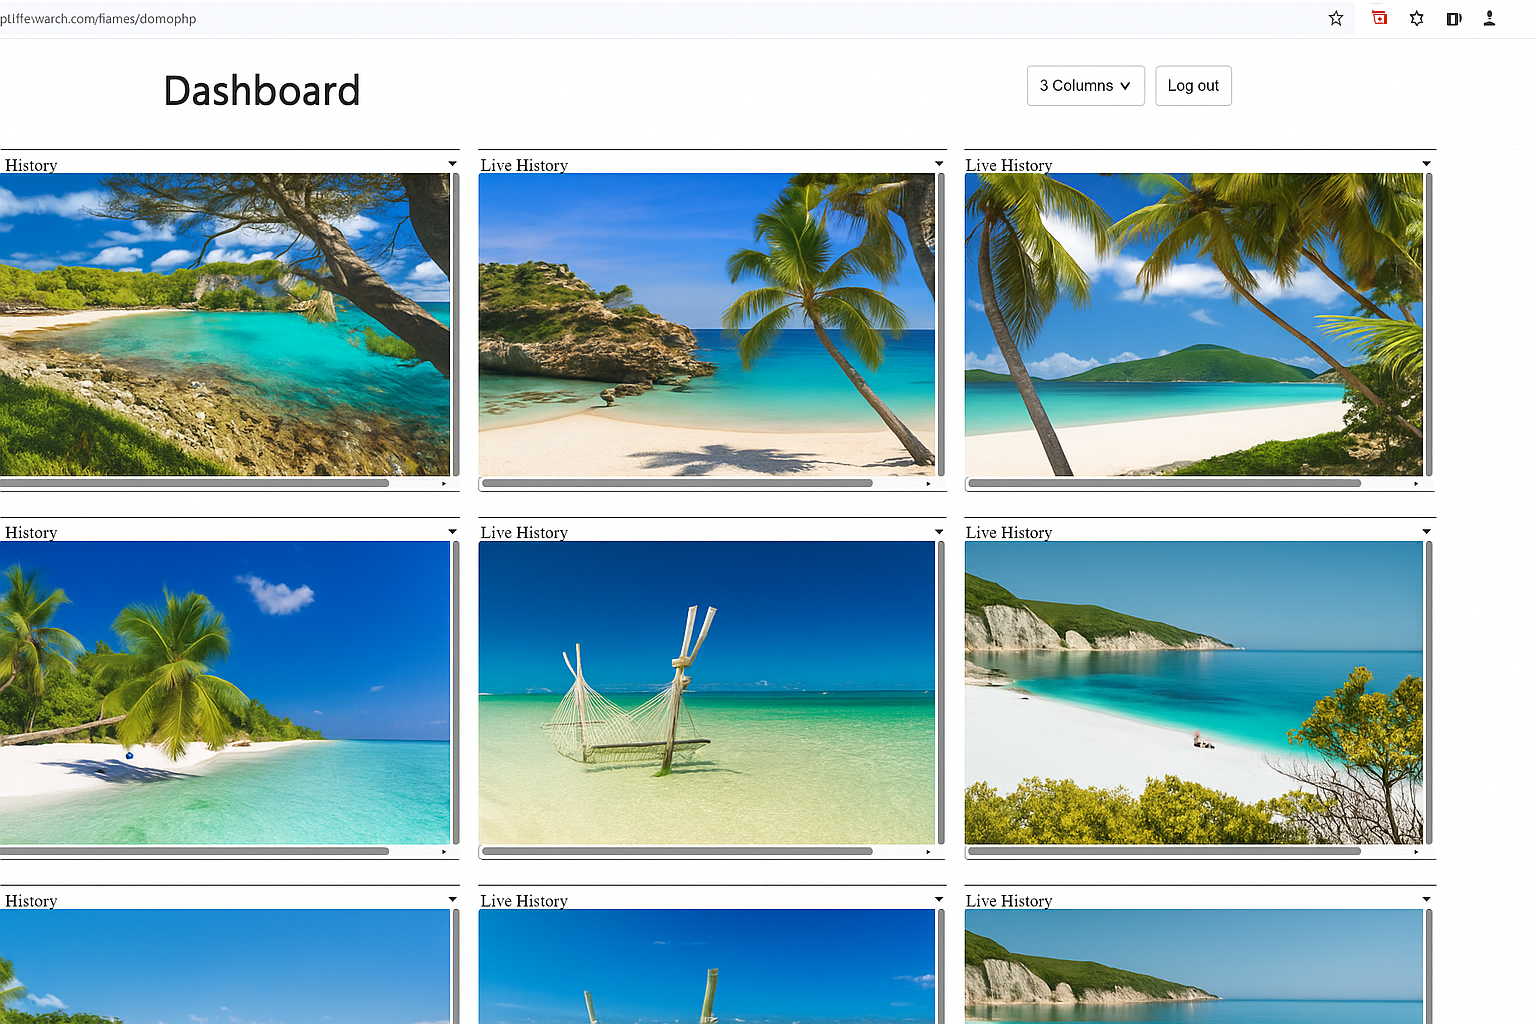
Example of a monitoring dashboard that combines live employee screens with screenshot history.
Many small and mid-sized companies want a clear picture of what is happening on work computers during the day. Not to control every click, but to understand whether key systems are used as planned, whether new staff have arrived in their workflows and whether important processes run smoothly.
IT service providers and managed service providers (MSPs) see the same need from another angle. They maintain many PCs for several clients and look for ways to provide more transparency and faster insight without building a heavy monitoring infrastructure from scratch.
Live screen monitoring with screenshot history combines two perspectives: you see what is happening now and you can review what happened earlier on selected PCs. In this article, you will learn how such a setup works in practice with Wolfeye, from the first installation to a live dashboard and screenshot history.
The focus is on technical implementation and everyday use. This article does not provide legal advice. Rules can differ between countries and situations, so legal questions should always be clarified with qualified experts in your region.
1. What Live Screen Monitoring and Screenshot History Actually Do
Before looking at the setup, it helps to clarify what live viewing and screenshot history technically do in a monitoring solution like Wolfeye.
- Live screen monitoring: The screens of monitored PCs are sent to a central dashboard. You can see several PCs at once in a grid view and focus on a single screen in more detail when needed.
- Screenshot history: In addition to the live view, screenshots can be recorded in defined intervals. Later, you can scroll through the timeline for one PC and see how the screen looked at specific points in time.
Used together, this gives you two complementary views:
- A real-time overview of what is going on right now.
- A traceable history of past screen content for selected periods.
How exactly you use these capabilities depends on your role. Owners often want quick overviews, while IT providers frequently use history to understand support cases or verify that new setups are used as intended.
2. Typical Scenarios for SMB Owners and Managers
For business owners and managers, live screens and screenshot history are mostly about clarity and process insight, not about technical details.
Typical scenarios include:
- New staff and onboarding: During the first days or weeks, you can see whether new employees are already working in the systems that matter for their role and whether they get stuck in unexpected places.
- Key workflows and core applications: You can check whether the main CRM, ERP, ticket system or industry application is really in use during core hours.
- Peak times and bottlenecks: In service desks, call centers or back office teams, the dashboard shows at a glance which workstations are busy and which are idle.
The goal in these examples is not to follow individuals minute by minute. The goal is to understand how digital work is actually happening so that you can improve processes, provide better training and support teams in a practical way.
3. Typical Scenarios for IT Service Providers and MSPs
For IT service providers, live view and screenshot history are tools to deliver more transparency, troubleshooting insight and service value.
Examples from everyday work:
- Faster analysis of support tickets: When a user reports that a system is "slow" or "behaves strangely", the technician can look at the live screen or a short history to understand what the user actually sees.
- Checking deployments and migrations: After introducing a new application or moving users to a new environment, you can verify that staff are working in the new system as intended.
- Documenting incidents internally: Screenshot history can provide visual context for internal reports or post incident reviews inside the IT team.
In this way, Wolfeye becomes a lightweight building block in your service toolbox. It does not replace existing remote management and support tools, but gives you a visual layer that is often difficult to achieve with classic logging alone.
4. Step 1 – Decide Which PCs to Monitor and How
The first step is always a clear scope. Instead of monitoring everything everywhere, you define specific groups of PCs where live screens and screenshot history are useful.
Typical starting points:
- Office desktops in one department.
- Workstations in a call center or support team.
- Selected PCs of remote staff for a pilot project.
At the same time, you decide how you intend to use the data in practice. For example, you might agree internally that:
- Dashboards are mainly used to understand workloads and workflows.
- Screenshot history is activated only on specific machines or for defined periods.
- Access to the dashboard is limited to owners, selected managers or the IT team.
This planning step is organisational, not legal. It helps you make sure that the technical setup supports your real business needs and fits your internal expectations. Any legal requirements must be checked separately with qualified local experts.
5. Step 2 – Install Wolfeye and Set Up the Live Dashboard
Once you know which PCs you want to monitor, you can set up Wolfeye in a structured way. The videos embedded below show these steps in detail in a live walkthrough.
- Install Wolfeye on the first PC. Start with one test machine to become familiar with the installation process and the dashboard.
- Connect the PC to your account. After installation, the PC appears in your Wolfeye dashboard and you can see its live screen.
- Repeat the installation on further PCs. Depending on your environment, this can be done manually or with the help of your existing deployment tools.
- Open the live dashboard. You see a grid with live thumbnails of all monitored PCs and can click on one to see it in full size.
- Organise PCs logically. For example by location, department, customer or function, so that you can navigate easily.
In many cases, this basic setup can be done in a short time. After that, you already have a working live overview, which you can gradually refine.
6. Step 3 – Configure Screenshot History and Everyday Use
The next step is to configure screenshot history in a way that is practical for your environment. In the second part of the walkthrough video, you see how this looks in the Wolfeye interface.
Important technical settings include:
- Recording interval: How often should screenshots be taken, for example every few seconds or every few minutes.
- Retention period: How long screenshots are kept before they are removed according to your internal rules.
- Scope: On which PCs and in which situations screenshot history should be enabled.
In everyday work, typical usage patterns are:
- Checking a specific time window when something unexpected was reported.
- Reviewing how a workflow looks on the screen to improve instructions and training materials.
- Supporting internal evaluations after technical incidents.
How exactly you configure these options should follow your internal policies and the legal framework that applies to you. This article can give you technical and organisational ideas, but it cannot replace local legal guidance.
7. Live Walkthrough: From First Live Screen to Screenshot History
The following two videos show a complete walkthrough of Wolfeye in practice. You see how to install the software, bring the first PC into the dashboard, view live screens and activate screenshot history.
Video Part 1: Live screen monitoring dashboard – from first installation to a working grid of employee screens.
Video Part 2: Screenshot history – how to record, view and navigate past screen activity on company PCs.
Frequently Asked Questions – Live Screens and Screenshot History
No additional special hardware is usually required. Wolfeye is installed as software on the PCs you want to monitor and sends screen information to a central dashboard.
Not necessarily. In practice, many organisations start with selected PCs or specific use cases and define where and when screenshot history should be enabled according to their internal rules.
No. This article explains technical and organisational aspects in general form. Laws and regulations differ between countries and situations. Before introducing any form of monitoring, you should clarify the legal requirements for your specific case with qualified legal counsel in your region.
Conclusion
Live screen monitoring with screenshot history can make the digital workday in companies more transparent and easier to understand.
Owners gain a better overview of how key systems are used. IT service providers get a visual tool that supports them in troubleshooting, documenting incidents and demonstrating service value.
At the same time, monitoring is a sensitive topic. Every organisation should carefully define how these functions are used, who has access and which internal rules apply. This article cannot replace legal advice and does not make any statement about what is allowed in a specific country or situation.
A practical approach is to start with a small, clearly defined pilot in a controlled environment, test Wolfeye with a few PCs and then decide together with management and, where appropriate, legal advisors how monitoring should be integrated into everyday work.
Want to test live screens and screenshot history with your own company PCs?
Start 14-Day Free TrialWolfeye is monitoring software. Any use must comply with the laws and regulations that apply in your country and situation. This article is for general information only and does not constitute legal advice or a guarantee of specific results.